Read the Container's History First
Every reclaimed container has a past, and that past decides its future. A biscuit tin that held shortbread is a very different starting point from a tin that held wood preserver, even if both look identical once the label is gone. Before you picture what will grow in it, spend a minute on three questions: what did it hold, how has it aged, and what is it made of?
Timber crates and boxes are usually untreated softwood. Check for oily stains, a chemical smell or green-tinged pressure-treated timber. Wooden pallets shipped internationally should carry the IPPC wheat-ear mark under the ISPM 15 standard; "HT" means heat treated and is the one you want, while "MB" means methyl bromide fumigation and is best avoided for planting. Older railway sleepers may be creosote-treated and should not hold edible crops.
Metal containers — tins, galvanised buckets, enamel bowls, colanders — are durable but conduct heat. On a south- or west-facing balcony a dark tin can cook shallow roots in a summer afternoon, so paint it a light colour or tuck it into the shade of bigger pots. Galvanised zinc is fine for ornamentals; line it if you grow herbs or salad.
Plastics are worth checking for the recycling resin code. Codes 2 (HDPE), 4 (LDPE) and 5 (PP) are the usual choices for growing; we avoid anything that held chemicals and anything that has turned chalky and brittle in sunlight. Ceramics should be glazed or labelled frost-resistant if they stay out over winter.
Drainage That Actually Drains
Most planter failures are drowning, not drought. Water needs a way out at the lowest point, so drill holes in the base itself rather than low on the sides. For containers up to about 30 cm across, three 6–8 mm holes are a sensible minimum; bigger troughs need more. The once-popular layer of gravel or crocks in the bottom does not improve drainage — guidance from the Royal Horticultural Society and soil scientists explains that it simply lifts the saturated zone higher into the root area. Use a free-draining compost instead.
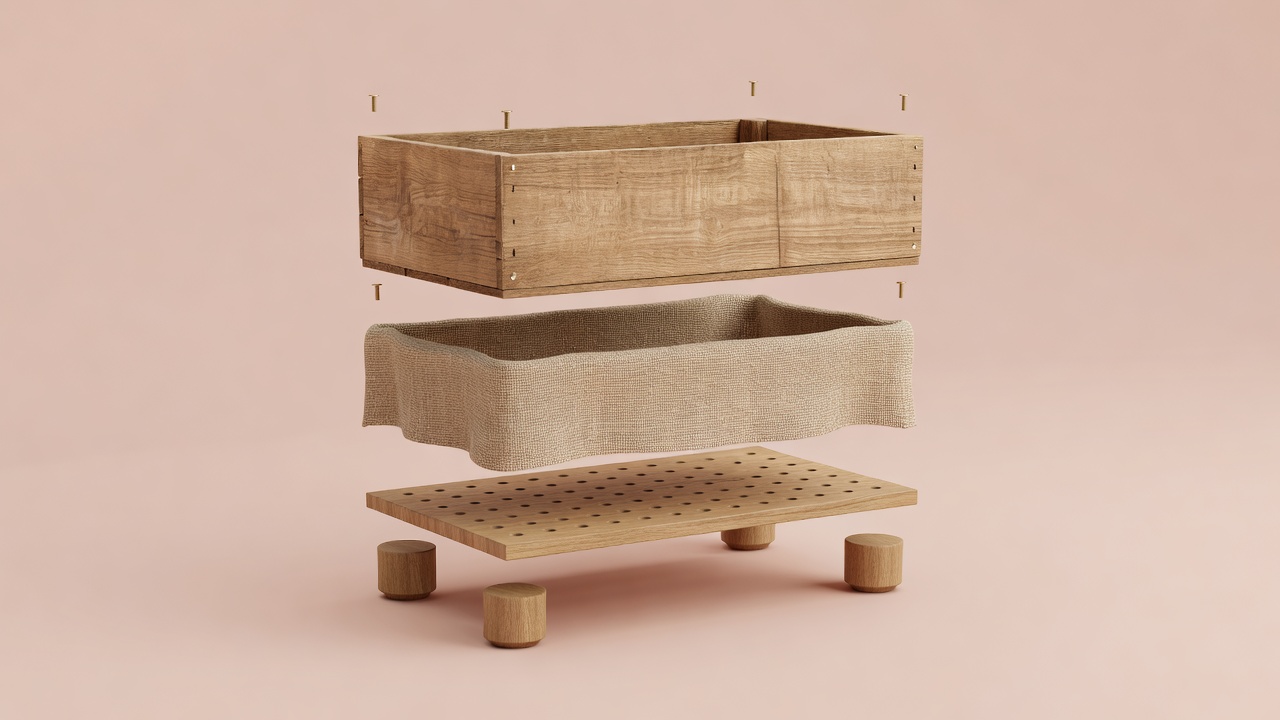
On a balcony, drainage has a second audience: the people below. Stand every planter on a saucer or drip tray, water slowly, and empty trays after heavy rain. Raising the planter on pot feet lets air move underneath, which helps timber bases last far longer.
Liners and What Touches the Soil
For timber, a breathable fabric liner keeps compost off the wood while letting moisture escape. Avoid wrapping the inside completely in plastic sheet: water collects between plastic and timber and rots the box from inside. For metal containers holding edibles, a fabric grow bag or food-grade plastic pot dropped inside the decorative shell is the simplest solution — it also means you can lift the plant out to clean the container.